How to Sharpen a Knife.
In the world of culinary craftsmanship, the importance of a razor-sharp knife cannot be overstated. A finely honed blade not only enhances efficiency in the kitchen but also plays a pivotal role in ensuring safety. This comprehensive guide aims to provide a detailed exploration of four effective methods for sharpening knives, empowering both home cooks and professional chefs, hunters, bushcrafter’s and people who love knives – like us! We’ll delve into the nuances of using a ceramic rod, a whetstone, a fixed-angle sharpener like the Lansky system, and explore the art of stropping a knife.
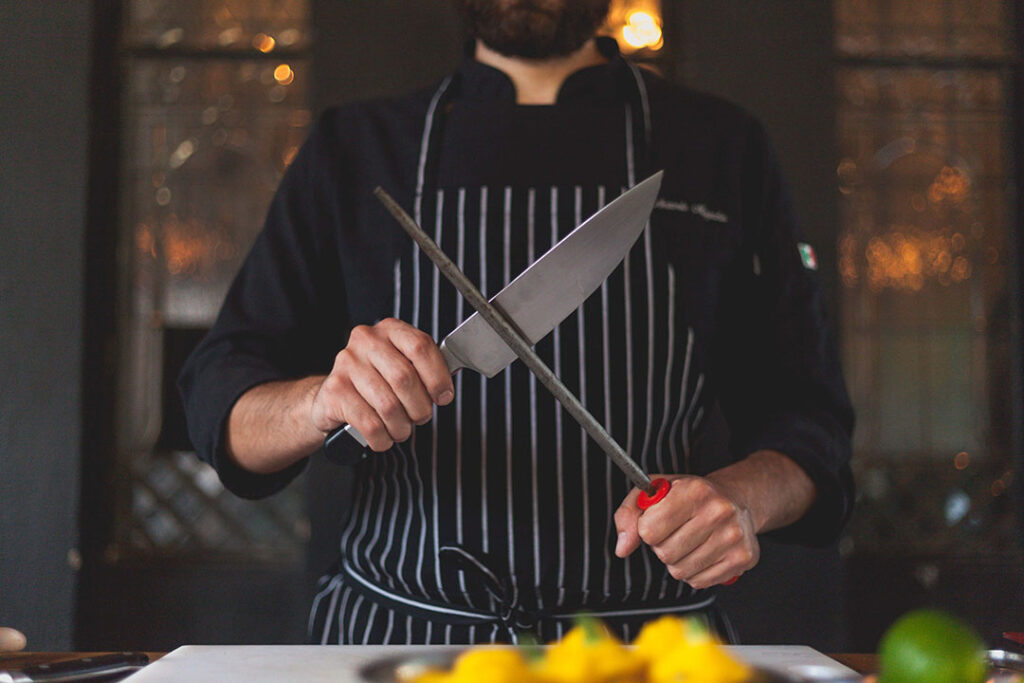
Sharpen a Knife with a Ceramic Rod:
The ceramic rod is a versatile tool often underappreciated for its ability to maintain knife sharpness. Not to be confused with a knife steel that doesn’t actually sharpen, rather keep a knife sharp. Let’s delve deeper into the process:
1) Understanding the Angle: While the commonly recommended angle is 20 degrees, it’s essential to note that individual knives may have different bevel angles. To determine this angle, consult the manufacturer’s guidelines or use a bevel gauge. If unavailable, I recommend coating just the knife edge in something like sharpie. That way, as you do the first couple of strokes, you’ll get a visible scratch patten against the black ink and can adjust until it’s even across the sharp edge. Adjust the ceramic rod placement accordingly.
2) Stabilizing the Rod: Place the ceramic rod vertically on a stable surface, ensuring it won’t slip during the sharpening process. This is a great method for beginners as it removes the guess work. However, as you become more consistent and experience, you’ll be able to do this without stabilizing the rod on a surface.
3) Maintaining Consistency: Hold the knife at the determined angle, starting at the base of the blade. Draw the knife down the rod while maintaining the prescribed angle. Repeat on the opposite side for even sharpening. Alternatively, do several strokes on one side, then switch to the other – remembering to do the same number on each side. Repeat until the knife is sharp. This can feel frustrating at first until you’ve had some practice and nailed the correct angle.
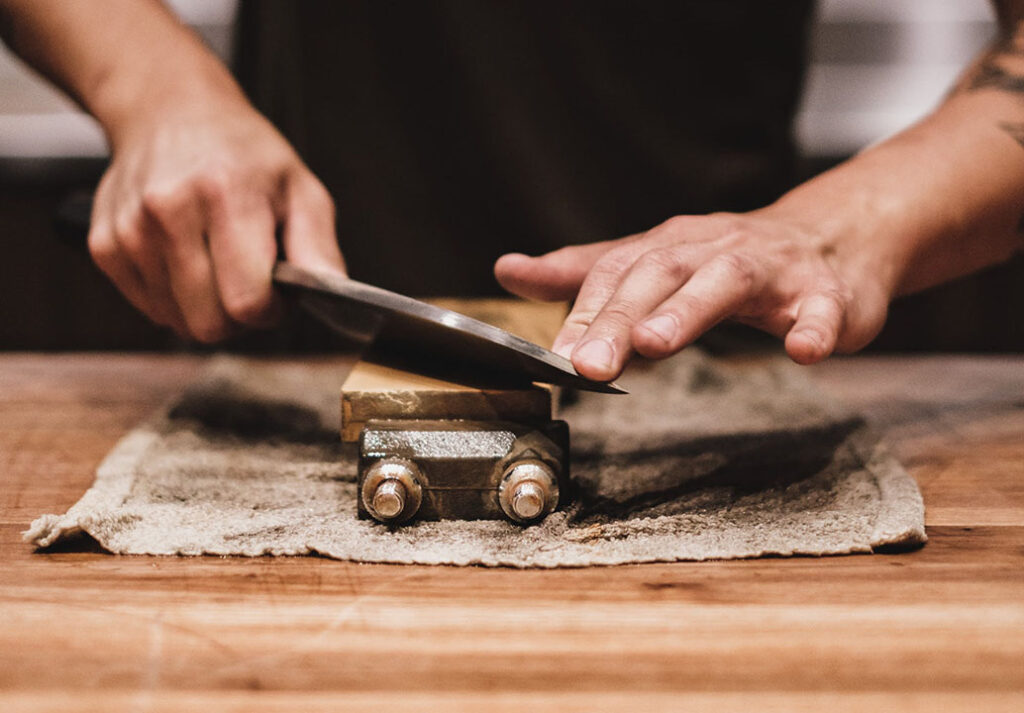
Sharpen a Knife with a Whetstone:
The whetstone, a traditional yet highly effective method, offers a hands-on experience. Here’s an in-depth guide. Don’t be disheartened, this one takes a lot of patience and practice, but we find it works with the most knives, and creates the best results overall. If you have a diamond stone or oil stone, the steps are the same, but substitute soaking in water for applying a layer of oil to the surface for oil stones. On diamond stones, you can just sharpen without a lubricant, but an oil based honing oil won’t hurt!
1) Soaking the Whetstone: Immerse the whetstone in water for a recommended 10-15 minutes to ensure it absorbs sufficient water. Don’t skip this step! With a whetstone this is essential.
2) Understanding Bevel Angles: Just like with the ceramic rod, know the bevel angle of your knife. This knowledge is crucial for maintaining the original edge geometry.
3) Setting Up the Whetstone: Place the whetstone on a stable surface with the coarse side facing up first complete resharpening, or the fine side for a touch up job. Some whetstones come with mounting stands that keep them locked in place. We find a table works just fine, but if you have some, a rubber mat makes this process easier.
4) Consistent Motion: Hold the knife at the determined angle, starting from the base. Draw the knife down the stone with consistent pressure, maintaining the prescribed angle. The sharpie trick from above works wonders here to make sure your angle is correct. On knives with curved tips, you’ll find you have to slightly angle the knife away from the stone as you approach the tip to ensure you get an even finish.
5) Flip & Finish: Once you’ve completed this on both sides of the knife, flip the whetstone to the finer side to get an even finer edge. If your stone doesn’t have a coarse and fine side, you may need to find a finer stone which will have the same effect. You can get really in depth into this and buy finer and finer stones. It’s something of a status symbol if you can polish your knife to a mirror finished edge!
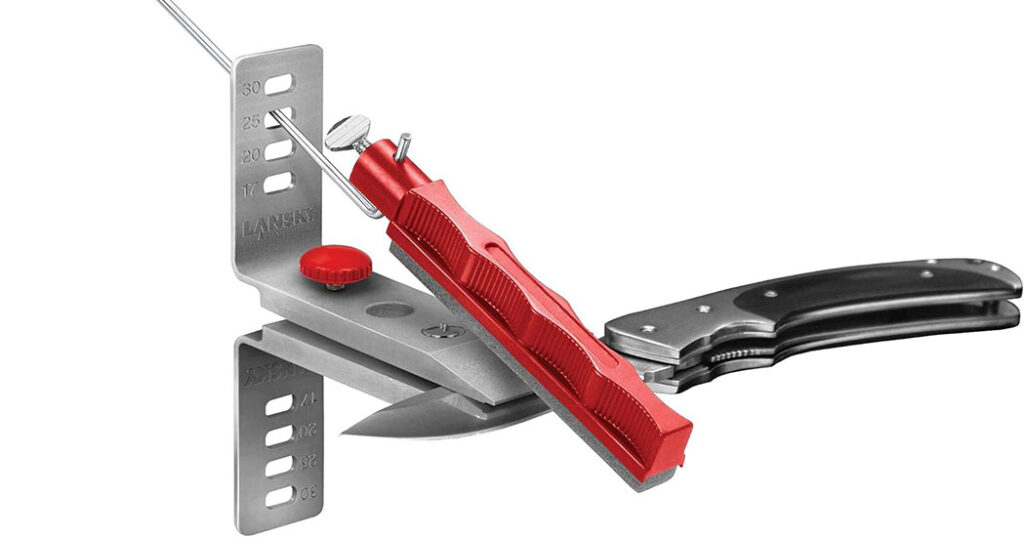
Sharpening with a Fixed-Angle Sharpener:
For precision and ease, a fixed-angle sharpener like the Lansky system is a fantastic choice. These systems vary a lot, so make sure you follow the manufacturers recommendations. In short though – on most systems the steps will be similar.
1) Determining Bevel Angles: As will all above methods, this step is crucial for achieving optimal results. Use a bevel gauge or consult the knife’s specifications to set the sharpener at the correct angle.
2) Clamping the Knife: Secure the knife in the sharpener’s clamp, ensuring it’s snug and stable.
3) Progressive Grits: Begin with the coarsest grit, drawing the sharpening stone or belt across the knife at the preset angle. Gradually progress through finer grits for a refined edge.
How to Strop a Knife:
Stropping, the final touch in the sharpening process, adds finesse, polish and can even be used to quickly touch up an already sharp knife for a razor finish.
1) Understanding Stropping Angles: Similar to sharpening, the angle is crucial. Maintain the angle by using a guide or practicing until you achieve consistency.
2) Tension in the Strop: Hold the strop taut between your hands, providing a smooth surface for the knife. I often clamp one end of the strop to a table or even hook it onto a door handle in a pinch!
3) Application of Honing Compound: Apply a small amount of honing compound to the strop for optimal results. I often use jewelers paste as you can find it in multiple different grits. However, you can also strop without paste if you are just enhancing an already sharp edge.
4) Methodical Stropping: Hold the knife at the determined angle, starting from the base. Draw the knife down the strop, maintaining the prescribed angle. Repeat on the other side for a uniformly polished edge. There really is nothing like a stropped knife. Stropping helps to remove microscopic burrs and generally smooths out the edge resulting an extremely sharp and high performing cutting edge.
Conclusion:
In conclusion, mastering the art of knife sharpening involves a nuanced understanding of bevel angles, the use of appropriate tools, and a commitment to consistency. Whether you choose the ceramic rod, whetstone, fixed-angle sharpener, or incorporate stropping, these methods will ensure your knives remain sharp, reliable, and ready for any culinary challenge. Always prioritize safety when working with sharp objects and keep them out of reach of children. With these tips, we hope you know fully understand how to sharpen a knife! If you found this guide helpful or have any questions, we invite you to share your thoughts below. If you need further information, you can have a quick look for more detail on Wikipedia. Great place to start, then look through the references at the bottom for even more resources! Happy sharpening! 🍴